It’s a nightmare scenario: imagine trying to log into one of your accounts (think: email… or social media… etc.) and being unable to gain access because your password has been changed by someone else who hacked into your account and took over.
Getting your account back is often difficult and time-consuming (and often, when it comes to social media accounts… it can be impossible).
Luckily, this is all easily avoidable.
It’s time to add one more layer of security to your digital world — 2-factor authentication — to ensure hackers can’t easily take over your accounts.
What is 2-factor authentication?
Two-factor authentication (2FA) is a security method that requires two forms of identification to access any account that requires a login.
In simpler terms, 2FA requires a username/password combination as your first form of identification when attempting to log into an account… and then requires a second form of identification to “prove that it’s really you” trying to log in (thus making it impossible for someone to steal your account if they happen to correctly guess your password).
Typically, that “second form of identification” is as simple as having access to a phone number, secondary email, or authentication app that you’ve previously registered as your 2FA method.
How Does 2FA Work?
In a sense, 2FA functions as an insurance policy against anyone else gaining access to your account, even if they were ever to guess/decode your main password. Instead, they would also need access to your chosen 2FA method, as well, in order to pass the “second round” of authentication
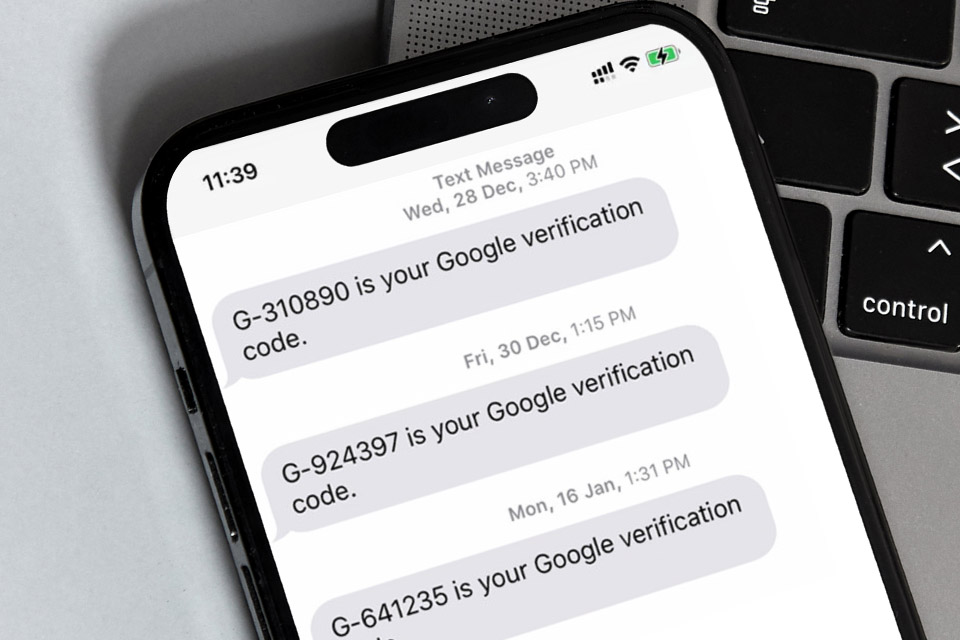
EXAMPLE: when trying to log in to your email account, you first submit a username/password combo… and then… your email provider also texts your phone a one-time-use PIN # that you have to enter in order to prove it’s really you trying to access your account.
In the above example, a hacker would have to know your main account password AND have access to your phone to be able to pass both authentication tests. Possible? Yes. Likely? No, not at all.
Setting Up 2FA
Luckily, activating 2FA on your accounts is relatively easy. For the purposes of this example, we’ll show you how to set it up on one of the most common/popular accounts that people hold, worldwide — a Google/Gmail account — but the process will likely be very similar if you’re trying to do this for any other type of account, email or otherwise.
First, you’ll want to log in to your Google/Gmail account.
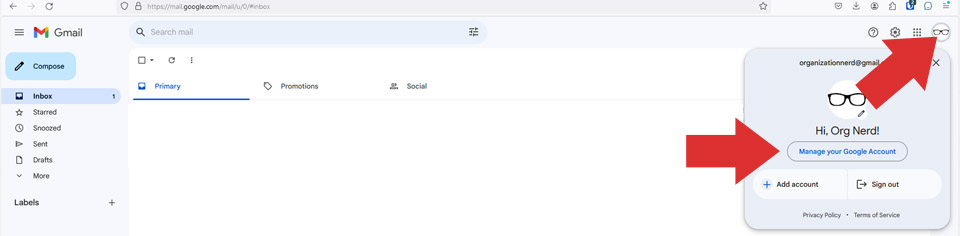
Once you’re logged in, click on your logo/initials at the top right corner of the page, as shown below… and then choose the “Manage your Google Account” link that appears in the pop-up window…
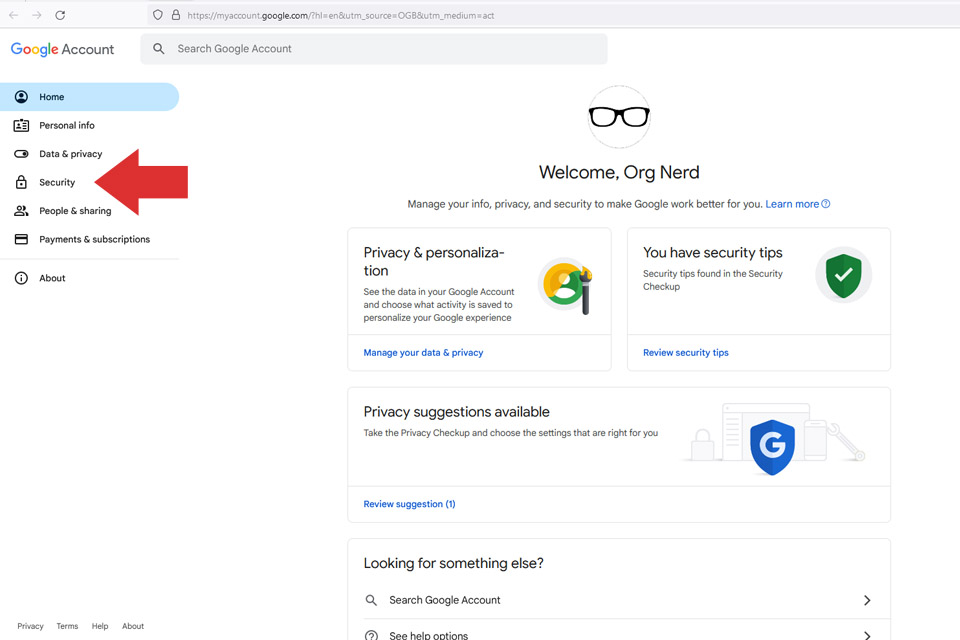
Upon clicking “Manage your Google Account,” a new window should open that looks somewhat like the next image, below. From there, use the menu on the left and click on “Security”…
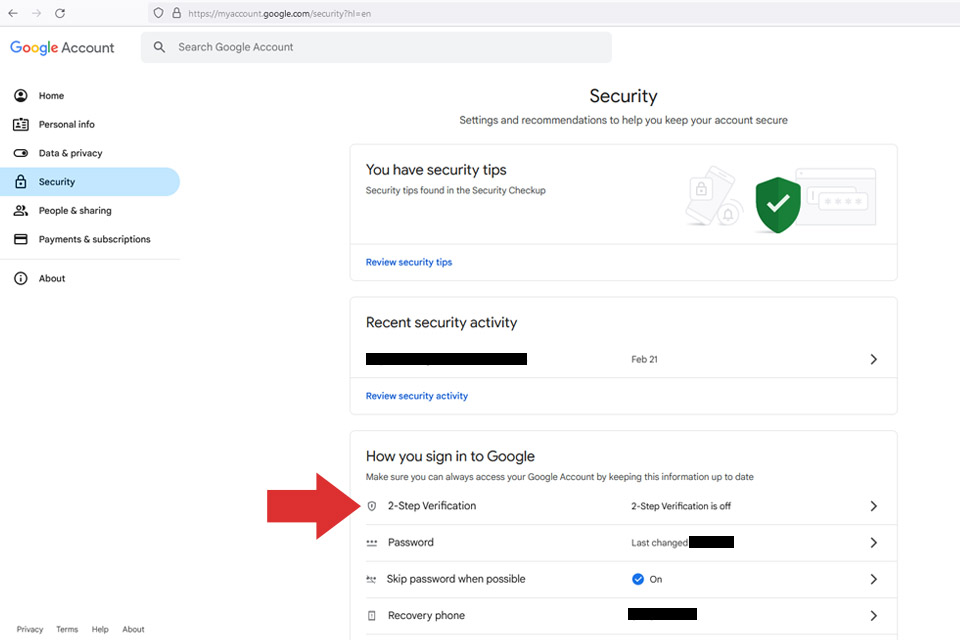
Next, you’ll want to look in the main content area under “How You Sign In To Google” and click on “2-Step Verification,” as shown here…
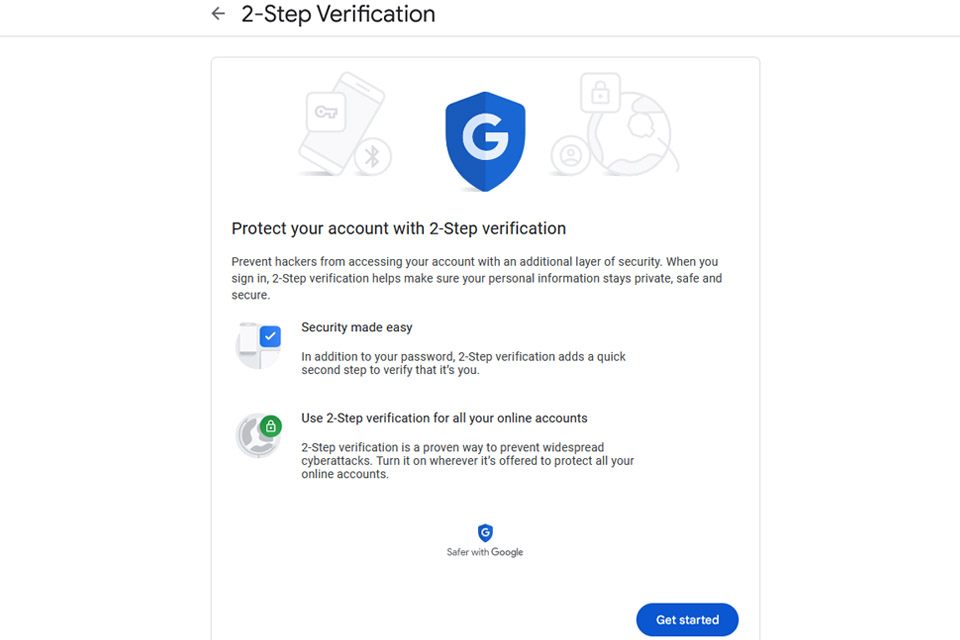
Now you should see a page that looks like this (or a similar variation of this, as Google may change its page structure over time, after this lesson was published); click the blue “Get started” button…
Depending on how long it’s been since you last logged in/out of your account, Google/Gmail might require you to provide your main password again after clicking “Get started”. If so, just enter it… and then…
…on the next page, you’ll see (a) your current 2FA status (either “ON” or “OFF”), along with a button to change the status (see red arrow, below)… and (b) a list of the potential options you can use as 2FA methods. The default method is phone-based (SMS text messages or voice calls to the phone number you used when you set-up your Google/Gmail account), as shown here…

As long as you already have a verified phone number attached to your Google/Gmail account (see the green “Verified” text in the image above)… then turning 2FA “ON” is as simple as clicking that blue “TURN ON” button by the red arrow in the image above this.
Yes, that’s it! That’s all it takes.
From that point forward, any time you want to sign-in to your account, you’ll be required to enter your username/password combo -AND- then also you’ll receive a text that contains a 6-digit verification code, which you’ll also have to enter.
By turning 2FA “ON,” you’ve ensured that gaining future access to your account will require both authentication steps (and more specifically, that nobody else will be able to gain access without having access to your phone/text messages).
High five!
Expand Your Use of 2FA
Now that you’ve learned how easy it is to add 2FA to your Google/Gmail account (or similar other email account from another provider)… you should consider adding this extra layer of protection to some of your other online accounts, as well.
For instance…
- social media accounts (FB, IG, etc.)
- online banking accounts
- online payment accounts (Venmo, PayPal, etc.)
- credit card accounts
- investment/stock trading accounts
- mortgage accounts
- tax filing services (TurboTax, H&R Block, etc.)
- utility accounts
- Amazon/Prime accounts
- cable/internet accounts (Comcast, Charter, etc.)
- streaming accounts (Netflix, Hulu, etc.)
- Apple ID accounts
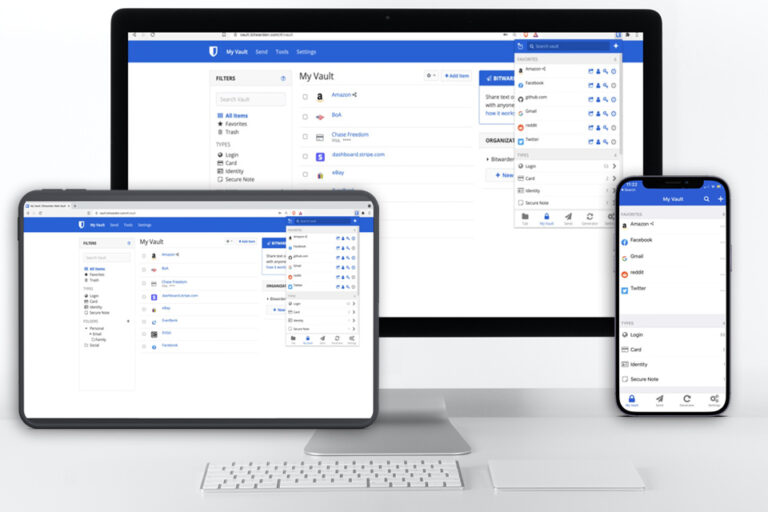
- password manager accounts (Bitwarden, LastPass, etc.)
Let’s quickly highlight that last list item… password manager accounts. This might be the most important type of account you choose to protect with 2FA. It’s a depository for information that is key to accessing all of your other accounts… and there is no question that it should be protected with 2FA.
*NOTE*
Haven’t set up a password manager account for yourself yet? Never fear… you can get started on that with our FREE lesson on “How To Safeguard & Organize Your Passwords.”
Knowing how important it is to protect your password manager account, though… we want to mention that there are actually some 2FA methods that are safer and more advanced than the simple phone-based (SMS texting or voice call) 2FA we taught you in this lesson.
Don’t get us wrong… any 2FA is better than no 2FA… but if you want to ‘up your game’ and increase your security without much extra effort… we highly recommend the 2FA methods that we will detail in our next lesson.
In our next lesson, “Advanced 2FA: Authenticator Apps, Prompts, & Security Keys,” we will teach you how to ‘up your 2FA game’ to maximize security and privacy through use of non-phone-based 2FA methods. You’ll need a Premium Membership at the Organization Nerd web site to access the next lesson (available for as little as $6/mo… and definitely worth it, as you’ll not only learn how to use advanced 2FA to protect your accounts, but premium membership also comes with (a) access to all monthly premium courses, (b) 50% discounts on everything in our shop, and (c) one FREE printable product per month).