Raise your hand if you’ve downloaded and installed hundreds of fonts (thousands, even?) onto your computer over the years.
If it can take you hours to find the perfect font for your project, this is the lesson for you.
A lot of us can likely relate to the frustration that comes from beginning a project, thinking of the perfect font that would complement it, but then… not being able to remember that font’s name and/or find it on your hard drive. The process of searching through all of your fonts manually can take for-ev-er.
The good news is that there is a simple way to view / organize / categorize your fonts (and even mark your “favorites”!) …and it will save you time and restore your sanity.
We’re talking about utilizing font manager software on your computer.
PC / Mac?
Before you download and install a font manager on your computer, you need to know which programs will work for you based on what operating system you’re running.
If you’re on a PC, you’ll want to check out NexusFont (which is what this lesson uses for all of the examples you’ll find, below). It’s not only FREE, but it’s also one of the most robust font managers around, boasting fantastic features and decades of support/updates.
Unfortunately, NexusFont is a PC-only product… so if you’re on a Mac, the next best alternative is likely FontBase. It’s also FREE, well-known, and packed full of lots of advanced features.
Download and install
As mentioned above, this lesson will be based on the use of NexusFont on a PC. Most of the steps will be the same if you’re on a Mac using FontBase, however (and/or if you’ve simply chosen another font manager that you like better than either of the above).
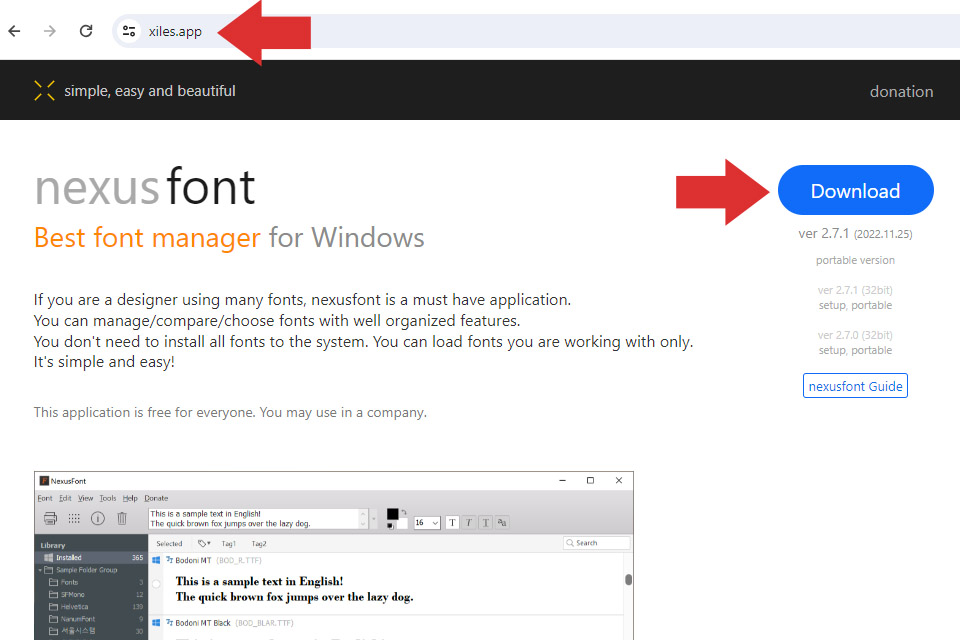
The first thing you need to do is download the NexusFont program from the xiles.app website, which should look like this…
*NOTE*
If you Google “NexusFont,” you’ll find an endless number of sites that will offer this program as a download (mainly because it’s FREE and open-source, so over time others have “adopted” it and started using it to boost traffic to their own sites); the xiles.app site shown above, however, is the original developer’s site and the safest place to download the program. It’s the only “NexusFont” site we will link to here within this lesson.
Click the blue “Download” button, and once the program file has successfully downloaded onto your computer you will find it in your “Downloads” folder. Double-click to open the file, and it will launch the auto-installer.
Depending on your Windows security settings, you may get a pop-up that looks like this, first…
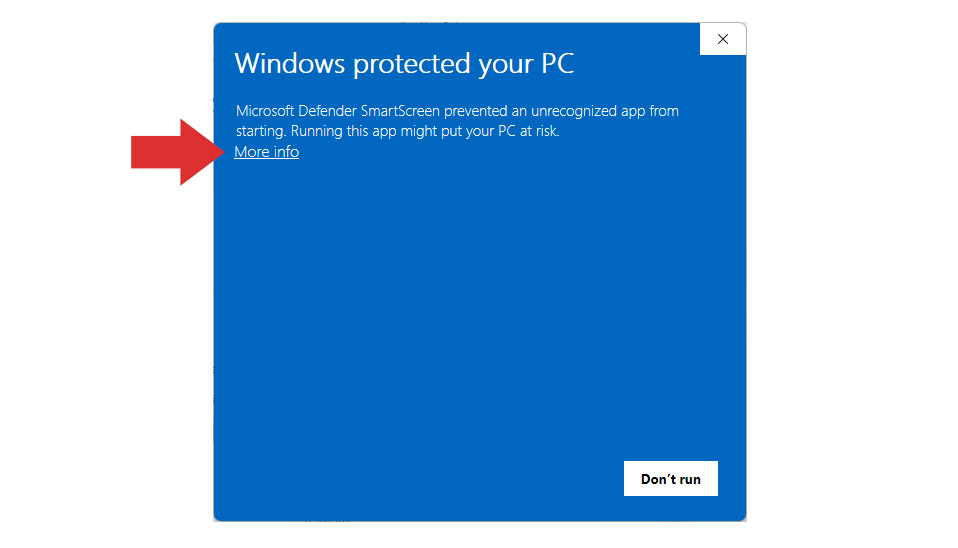
If so, click on “More info” (see red arrow, above)… which will open up more options for actually running the program installer, as shown here…
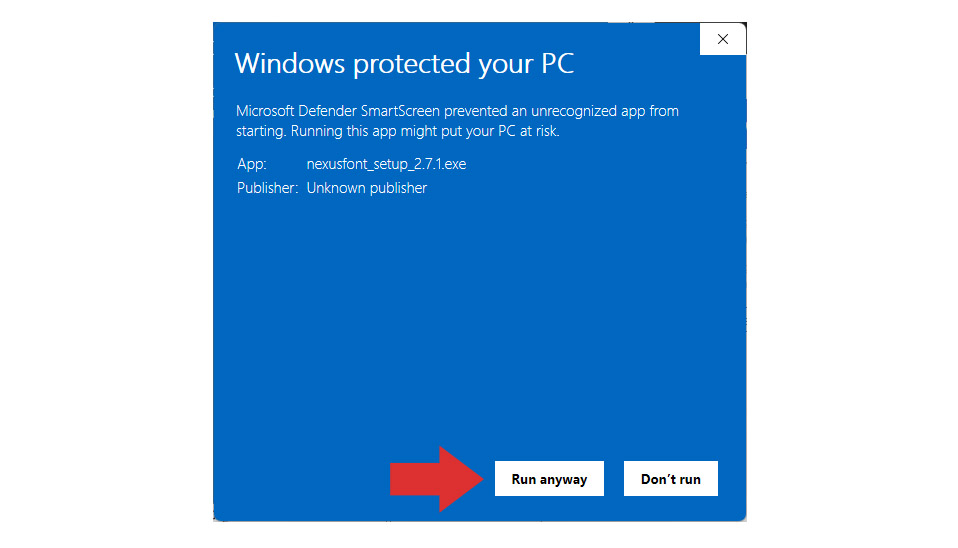
Click the “Run anyway” button (shown above) and the installer will begin working. You’ll likely have to click “OK” or “continue” a couple of times as your computer attempts to make sure you really want to install this software (yes, I do… I really, really do!).
Even if you didn’t get any of the above pop-ups… at some point, the installer will ask you where you want the program installed on your computer’s hard drive. Unless you want to change the default setting/location, you can simply click “Next” as shown here (otherwise, you’ll use the “Browse” button to change the install location)…
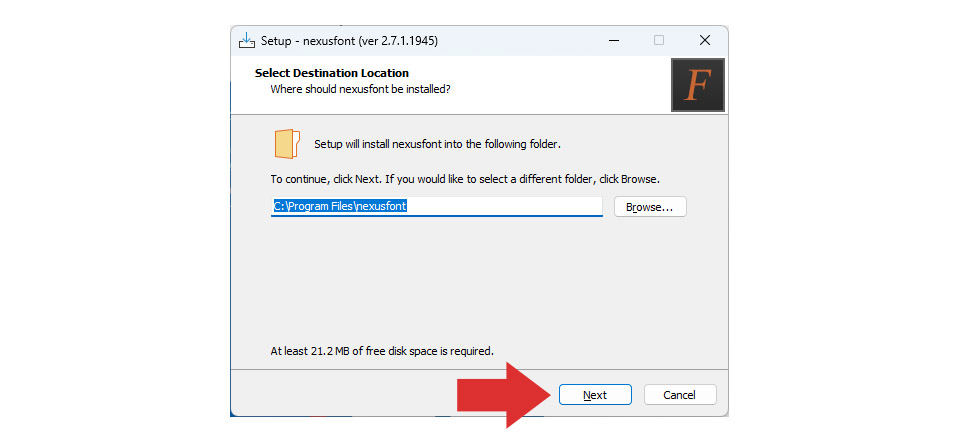
The installer will also give you a chance to customize (or accept defaults) for things like the creation of menu shortcuts, desktop shortcuts, etc. Unless you have specific preferences for this sort of thing, it’s fine to just keep clicking “Next” for each of these.
Eventually, you’ll get to a screen that has the option to click an “Install” button… and you’ll do that. Installation should usually take less than a minute, and once complete you’ll click “Finish” on the installer’s pop-up window to complete/finalize the process.
Open & Tour the Program
We’ll run through a few of this program’s basic features here, as a sort of mini-tour of the program.
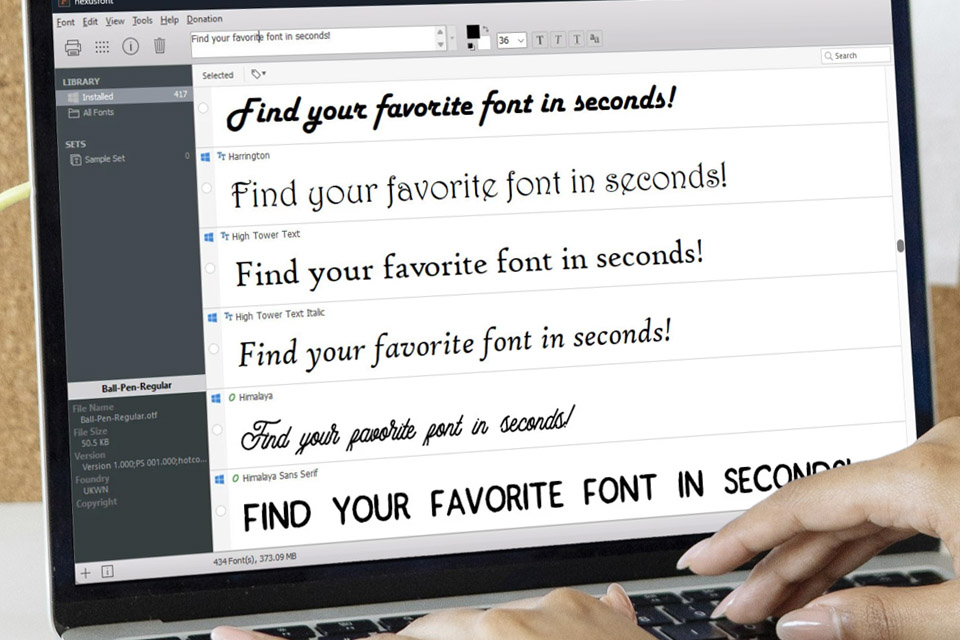
The first time you open NexusFont after installing it on your computer, it will display whatever fonts it has already found on your hard drive at that point, as shown here…
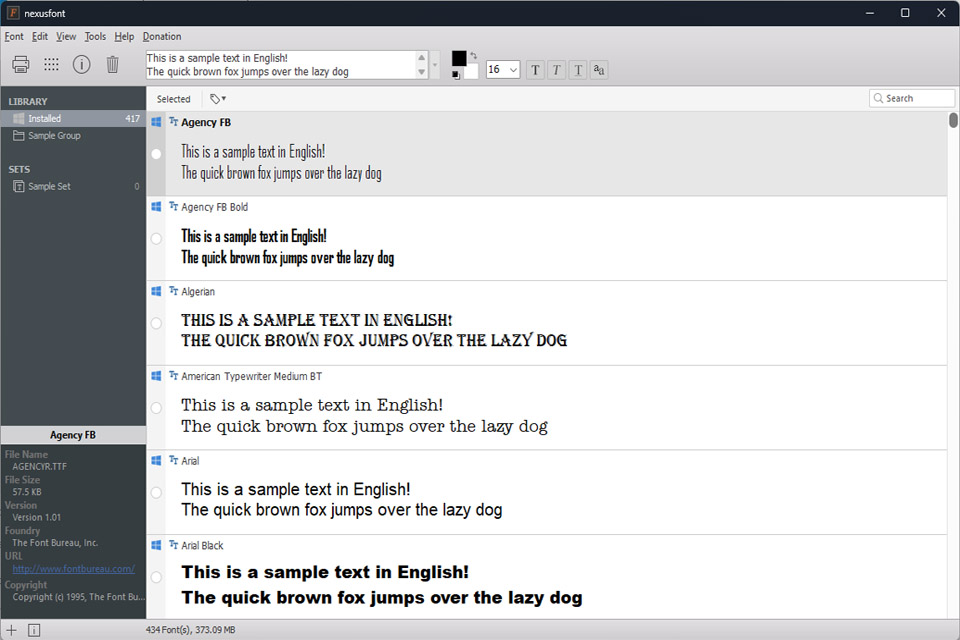
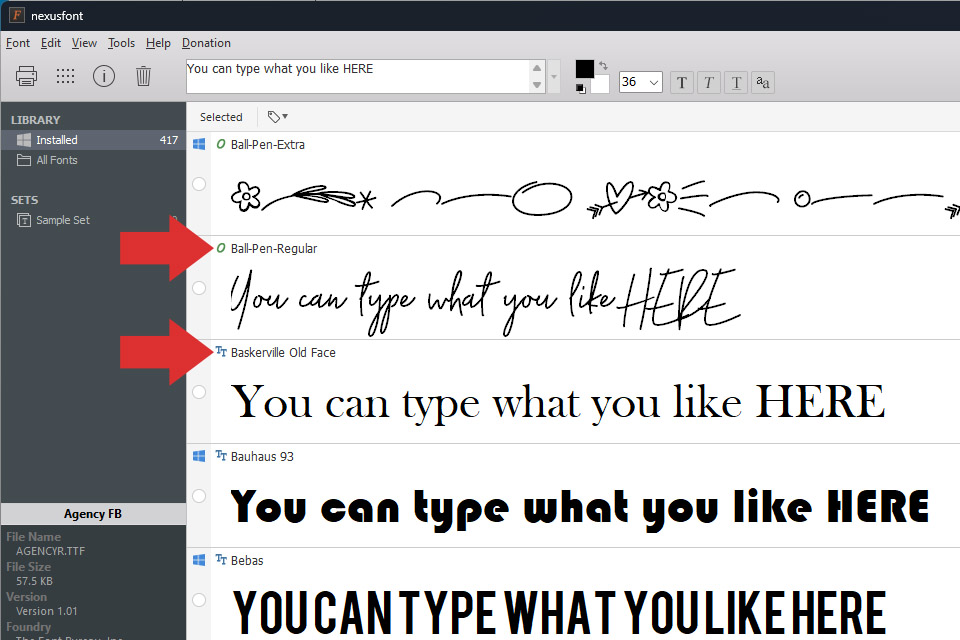
First, note the text field near the top center of the page. You can use this field to type (and thus visually preview) any text you’d like to see — in any of the fonts that are found on your hard drive — as shown here…
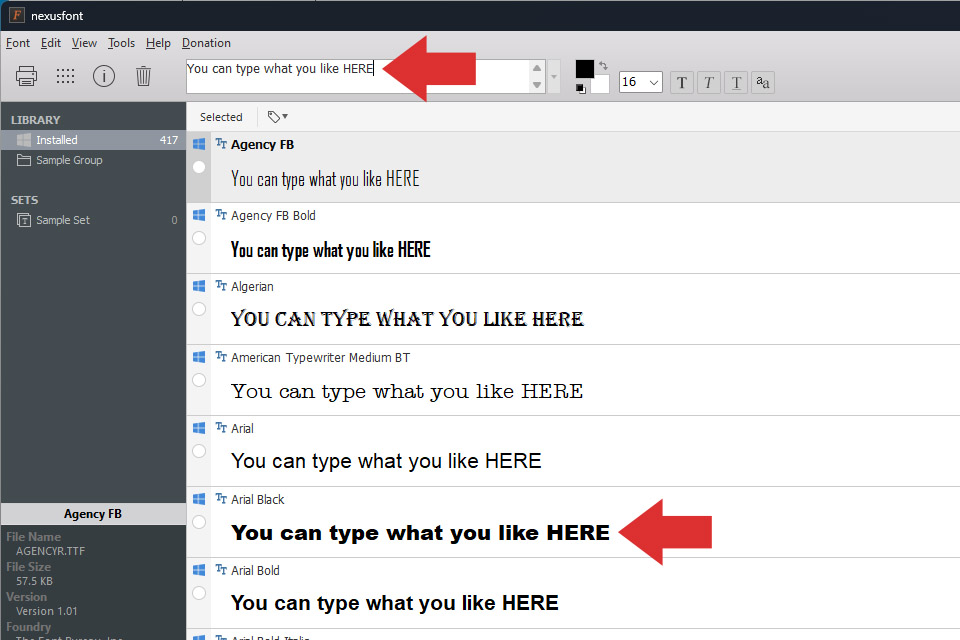
This is a really useful feature that comes in handy whenever you want to see exactly what certain text will look like, making it easier to visually choose between a variety of different fonts.
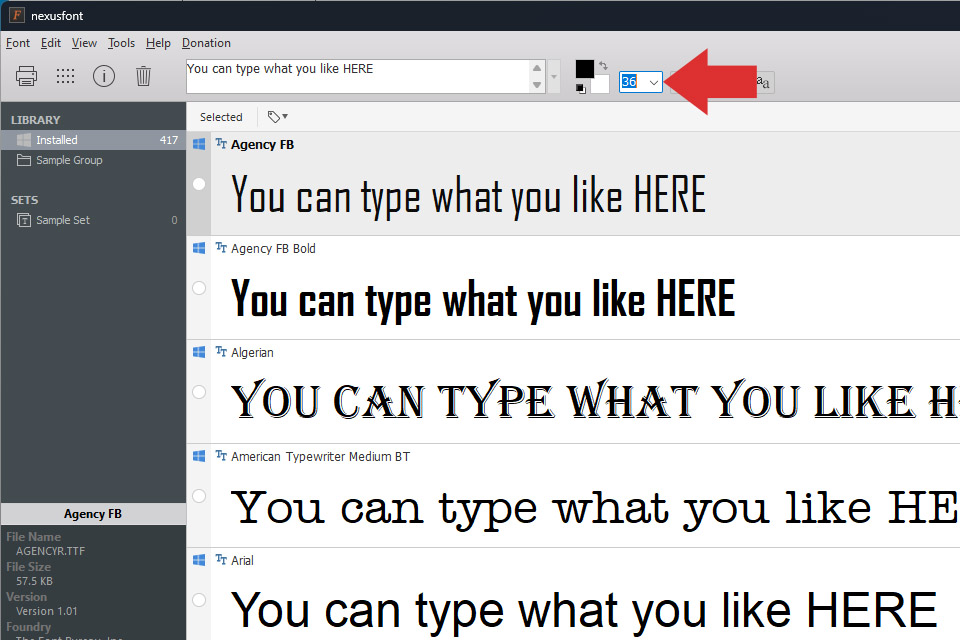
Another useful feature is the ability to change the size of each font when viewing the sample text, as shown below (note the difference between the following samples in 36pt… as opposed to 16pt, as shown above)…
But wait! That’s not all! #InfomercialMode
You can also change the text color when viewing sample text, by using the color picker as shown here…
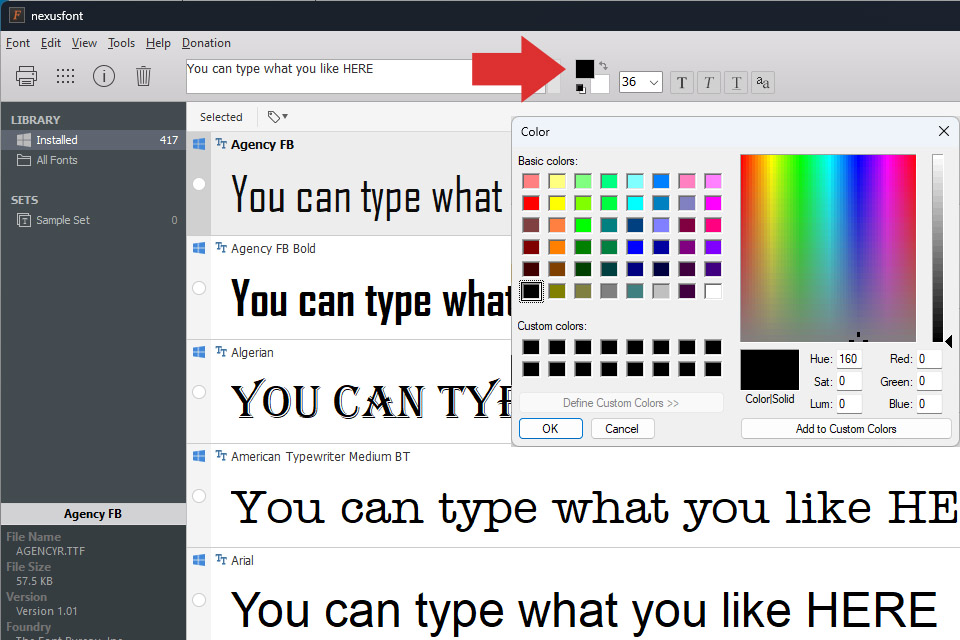
Just select whatever color you want to see (using either the pre-selected “Basic colors” option on the left… or by creating your own custom color on the right, which you can then add/save to the “Custom color” palette at the lower left).
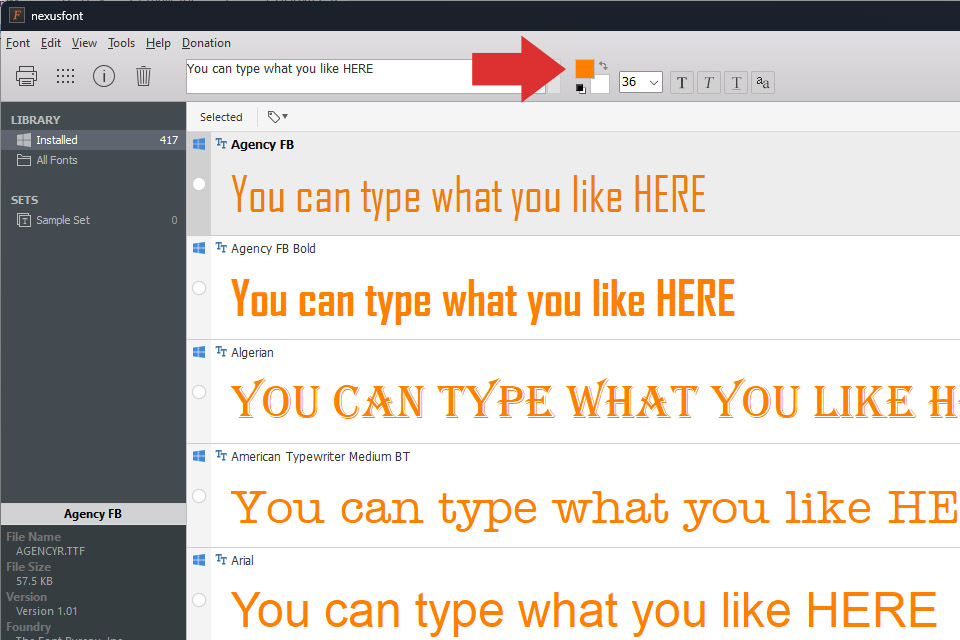
Here’s what it looked like when we tested orange text…
Additionally, you can also quickly tell the format of each of your fonts — TrueType or OpenType — by looking at the tiny icon to the left of the font names (“TT” for TrueType, and “O” for OpenType), as shown here…
Already, you can see just how useful this program can be, given how easy it is to type out custom text and then scroll down through alllllllllll of your fonts (hundreds? thousands?) to see the text in countless different font options + sizes, colors, etc.
Now… imagine just how fantastic it would be to search by font type — for instance, “only script fonts” or “only bold chunky sans serif fonts” — to help you locate the perfect font more quickly. That’s exactly what we’ll cover in our next lesson (along with highlighting a bunch of other NexusFont features… such as viewing character maps, printing out font comparisons, installing/uninstalling fonts directly from the software, and more).
In our next lesson, “Setting Up a Font Manager: Organize, Categorize, & Save Time,” we will teach you how to save hours of your time by setting up groups, folders, and categories in your font organizer software. You’ll need a Premium Membership at the Organization Nerd web site to access the next lesson (available for as little as $6/mo… and definitely worth it, as you’ll not only learn how to use advanced 2FA to protect your accounts, but premium membership also comes with (a) access to all monthly premium courses, (b) 50% discounts on everything in our shop, and (c) one FREE printable product per month).